How to Import Cycle Changes?
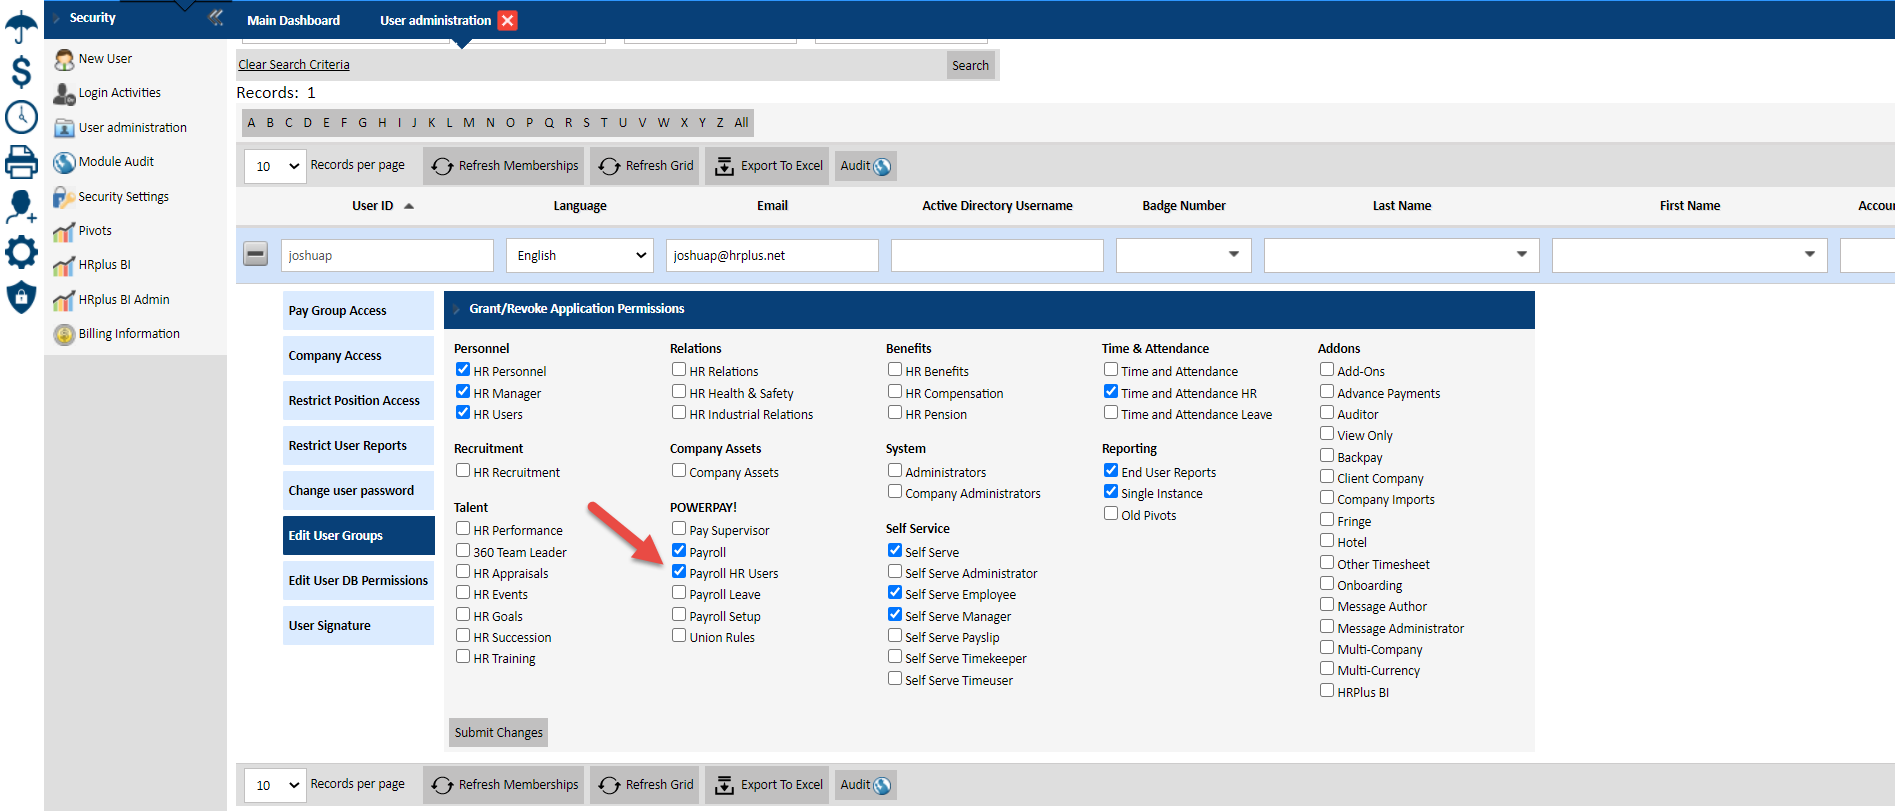
NB*HR users will need to be granted access to the relevant permissions to make the changes via cycle changes in the Powerpay module.
Please see an example of the permissions required below:

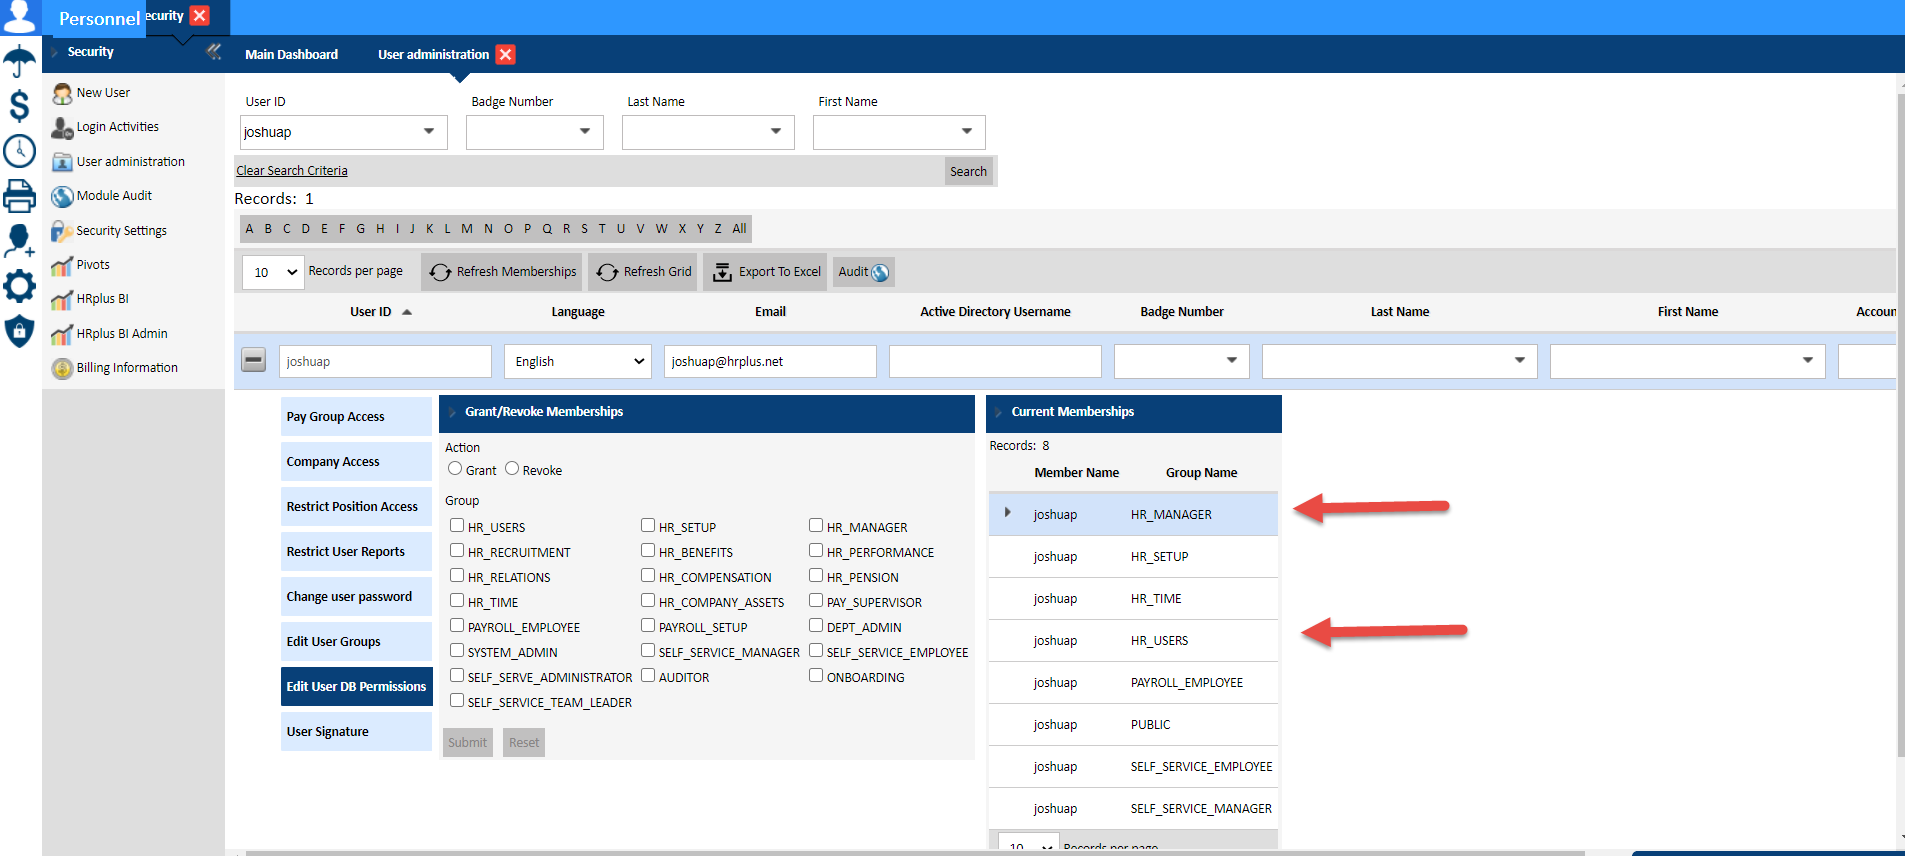
From there you will need to ensure that the User has the required DB permissions to conduct the HR transactions necessary to enter the employees' banking and account information. Please see below:

Once the HR users can access the POWERPAY module, they will be able to enter a template via the navigation below to update, change or enter employee banking information:
Please see the steps below that the HR user can take to conduct a cycle change import via the import cycle changes screen:
Navigation: POWERPAY>>Process Payroll>>Import Cycle Changes>>Fixed Data Imports
The process is divided into four (4) steps:
1. Fill out the template
2. Create a header
3. Import template
4. Validate and post the data
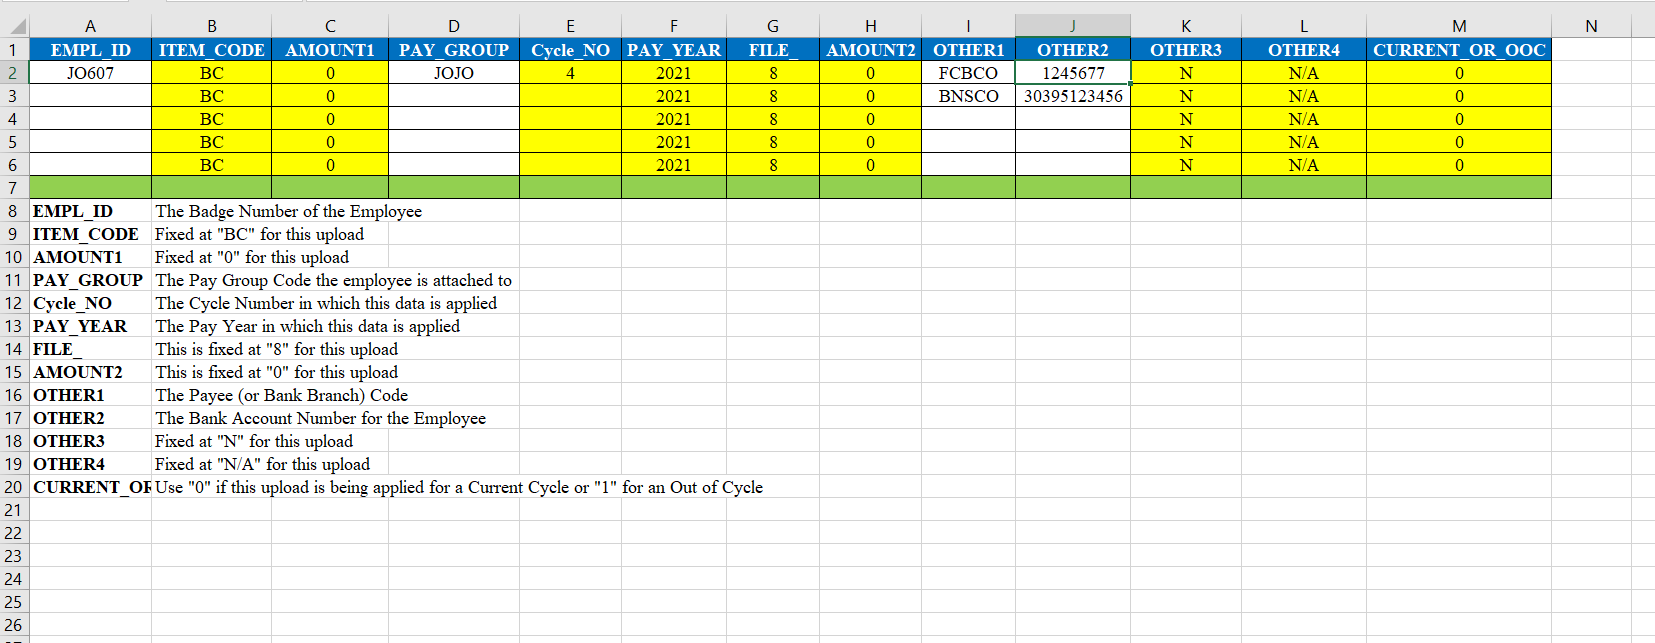
1. Fill out the template; Ensure to have the current entries removed before uploading the template. Please see an example below:

2. Create a header; You will need to create a header in the import cycle changes screen by selecting New Record, as shown in step one below, then select the correct pay group for which the banking information is being entered, the current cycle in which the update is being made, the current cycle, and the File Type '8' for Pay Profile Bank Change. Then you will need to ensure to save the header as shown in step (7) below:

3. Import template: Once the record is saved, you must expand the record by clicking the additional sign

From there you will be to select Import data and search for the completed template with the employees' banking information to upload


4. Validate and Post Entries: Once the template is properly filled out, the entries will appear in the grid as shown below, and you will be able to submit and save them accordingly.

The record will show up on the screen. Select the option "Validate Entries" on the main record. The application will verify the employee Badge numbers entered on the excel sheet and flag any inconsistencies.
A pop-up message will show up indicating that all the entries are valid. Select "OK" to continue.

All validated entries will have a 'check mark' to the right of each record. Once the entries are valid, you can select 'Post Entries'.

A pop-up message will show up to confirm that you want to post the information. Select "OK" to continue.

A message to indicate that all the entries were successfully posted will show up. Select "OK" to continue.

You can confirm that the entries were posted, by expanding the record and confirming that the "Posted" check box is flagged.

*Once the cycle changes are posted, you can navigate to Cycle Changes to verify your entries on the current payroll have been posted
Navigation: Powerpay>>Process Payroll>> Cycle Changes

Related Articles
Barbados NIS and Personal Allowance Changes 2025
BARBADOS NIS CHANGES 2025 EE NIS: 11% BASE GROSS INSURABLE EARNINGS EE NIS: 12.75% BASE GROSS INSURABLE EARNINGS EE AND ER RESILIENCE FUND (RRF): 0.25% BASE GROSS SALARY ITEMS Table Name: BB_RRFparam Fields: Type_ ; Fld1; Fld2 (1) Type_ takes four ...How to Reset Deductions set up as First and Second Cycle
1. For the employee with the deduction setup as the First Cycle only You will need to do two cycle changes in order to make this deduction regular again. 1st A deduction entry, First Cycle with amount cero (0). Sample below 2nd Enter a New entry ...How to Import Employee Contact Information ( email addresses )
An import feature is available for uploading of email addresses to employee profiles. Navigation: System Configurations >> Company Imports >> Import Contact Info Please use the attached template to upload the contact information. Once you fill out ...Post Attendance Log to Time sheet Error: Cycle Number cannot be Null EmpTimeClocktimeSheet cannot be null
ERROR POSIBLE SOLUTION 1. An employee is being put into a pay group for which no pay cycles are generated for the cycle that is being posted. Create the pay cycles for that pay group and then try to post the time sheets to the cycle changes again. 2. ...How to import/create Entities
The first step in setting up your company’s structure on HRplus is to create all the entities such as Company, Division, Department and Section name with the codes. This can be imported using the template attached.